Showing posts with label pincushions. Show all posts

Monday, May 6, 2013

Faux Cathedral Window Pincushion - Day 14 on Pins and Needles


Sorry for the break in blogging.  I had surgery almost 2 weeks ago and as much as I tried to get ahead it was just not possible.

Today I bring you a lovely little pincushion design that is fast and easy to make. The tutorial calls for 8 different fabrics but I made mine using only 2 fabrics for a more traditional cathedral window block look.


The tutorial calls for machine sewing the turned edges but I chose to hand stitch mine along with adding a shank button on top and a regular 4 hole button on the bottom.  This little pincushion is fast and fun to make and a great way to use up scraps of fabric from other projects.

Hope you enjoy this tutorial and I hope to keep bringing you some really fun projects every week.  If you drop by leave a comment and share any pincushion ideas you may have.

Monday, April 15, 2013

Picture Frame Pin Cushion - Day 13 of 100 Days on Pins and Needles


I have several empty picture frames lying around and this project seemed a fun way to use them to create something for my sewing space.  If you don't have any frames a quick trip to your local Dollar Store could fix that inexpensively, which is what I did to give this project a trial run.


The one in the tutorial was painted with acrylic paint but I used a small silver frame that I purchased at the Dollar Store to try out this project.  This is a project that you could do with a vintage frame and it can be set up as a display piece or lay it flat and use it when you do handwork.  It can be made using a large or small frame and embellish it with beads, buttons or other trinkets glued on the frame or sew them onto the pincushion edges.  It is an easy to do pincushion idea that required no sewing and the way I made mine I didn't even use any glue.


I used my silver toned frame that reflects the color of items around it and added some decorator fabric for the pincushion area.  I folded a small piece of polyester batting to just slightly larger than the opening of the frame.  I then layered the decorator fabric over it, centering the design I wanted to focus on.  I then pushed the batting through the opening to create the "pincushion" part, cut the fabric the size of the frame and tucked it into the frame edges and then slipped the back of the frame into place.  It may take a bit of effort to get the frame backing on because the fabric makes it a tighter fit, but it was great because I didn't have to glue or sew anything.


If you have a special frame you don't want to throw away find some fabric that works with it and make a pincushion.  Give it as a gift or display in your home, the possibilities are endless.

If you drop by to check things out please leave a comment and share any ideas you have.  May you frame your road down "life in the craft lane" with lots of memories.

Monday, April 1, 2013

Pincushion Dish - Day 12 of 100 Days on Pins and Needles


Do you have one odd dish from a long lost set?  How about a vase you no longer use for flowers but can't bear to throw out?  Well after reviewing my collection of pincushion ideas I found this quick and easy project that transfers any small dish or vase into a lovely sewing room addition. 


For my first sample at the top of the page I used a small parfait dish and inserted my pincushion form and turned it into a handy pincushion on a pedestal.  My pincushion fit in the dish nice and tight so I didn't have to glue it to secure in place.

My second option, below, I made using my previously made "tomato" pincushion and a small Japanese tea cup that I found at the thrift store.  Once more the pincushion form fit in it nice and tight, so I don't have to worry about it falling out.


This tutorial is super easy to follow and takes only a few items to create a handy and cute addition to your sewing space.  Remember all you need is a dish or small vase, some fabric scraps, fiberfill, a pair of scissors, a needle and thread  then just click on the link above and find the instructions to start creating.

I hope you enjoy another fun idea for a quick and easy Mother's Day gift idea, add some special embellishments and create a very special one of a kind pincushion.  Don't have a dish or vase, check out your local thrift stores and see what you can find.

Enjoy this new idea to turn a household item and a few sewing or craft items into a great looking sewing accessory and don't forget to leave a comment or share what your are making.  

Drop in every Monday and join me in my search to find 100 different pincushion ideas as I take a walk down "life in the craft lane".

Monday, March 25, 2013

Flower Pot Pincushion - Day 11 of 100 Days on Pins and Needles

Spring?  Well whether mother nature is telling us it is Spring or if she is still covering you with a blanket of snow where you live, the calendar says Spring has arrived.  With that in mind I spent the weekend shopping for some new herb plants for my garden and at the same time purchased some crafting items at the garden center.  I brought my love of flowers and gardening into my sewing area by creating a fun and useful Flower Pot pincushion.


I used my handy E-6000 glue and attached a small clay flower pot to a clay flower pot saucer, adding the saucer gives you a great place to hold thread, buttons or other sewing notions you may need while sewing or crafting.  You could even add a larger saucer to give you more space for extra stuff.

I showcase two versions of my pincushions, in the first one I used a salad plate as a template and cut out a fabric circle, gathered the edge with a needle and thread then stuffed with fiberfill.  In the second version I inserted the tomato pincushion I made a few weeks ago into the pot to use as my pincushion.  Because of the tight fit in both I did not have to glue the pincushion into the pot, the pins are corsage pins and I added the flower beads to give them a really fun garden look. As always I found a tutorial to share if you would like to create your own flower pot pincushion to give as a gift or just add a touch of Spring to your sewing area.


The tutorial gives you an easy way to make the pincushion that requires no sewing and you use a hot glue gun to attach the pincushion into the pot.  A great tutorial that is fast and easy to put together.

I hope you create your own little garden to display in your sewing space, anywhere in your home or share a little bit of Spring with someone else.  If you drop in and check out my blog please leave a comment and let me know what you think.  I hope you enjoy a walk in the sunshine and don't forget to stop and smell the roses as you take an inspirational walk down "life in the craft lane".  

Monday, March 18, 2013

Easter Pincushion - Day 10 - 100 Days on Pins and Needles

Everything around us is Easter themed right now and with that in mind I continue to find more Easter pincushions that could have more than one use.  As I mentioned in my last pincushion post the stuffed egg shaped cushions could be given to children as a fun toss game for an Easter treat instead of candy. This weeks feature has a different twist as a home decor item but could also be used as a toss game item for children as an Easter treat too.


Pincushions are not just for pins.

 Many years ago when my husband was active duty Army we spent many years in Germany.  A tradition there during the Easter season they bring in fresh branches place them in a vase and create what they call an "Easter Tree".  They decorate them with blown out eggs that are beautifully hand painted along with little wooden decorations of rabbits, and other Easter themed items.

Along with the egg shaped pincushions I already made I added a new look with a felted wool egg that is decorated with machine embroidery and has raw edges cut with pinking shears.  I also found a new design, pictured above, to add to my "tree", making mine out of felted wool.  Instead of hand embroidery and felt cutouts I did some machine embroidery designs on the "egg", added felted wool blades of grass along with machine stitched grass, a die cut flower shape embellished with a button and topped it off with a sheer ribbon for hanging. If I were making it as a child's gift I would not add buttons or any other items that could be pulled off and swallowed.


I decided to use my newly made Easter Egg pincushions to decorate my own "Easter Tree" to add to my holiday decor.


Once Easter is over you can take your decorations down and hang them in your sewing room as a cute little decor item, use them as gifts for your sewing friends or keep them and use them as pincushions for yourself.

I hope that I have given you some ideas of not only how to make some cute gift ideas but how to add seasonal fun to your home and sewing.  Take a walk down "life in the craft lane" and see what you can find to inspire your next creative project.

Tuesday, February 12, 2013

Doll Pincushion - Day 7 of 100 Days on Pins and Needles

I had to take a break from my quest to find and make a variety of pincushions and needle books due to family illness but now I am back to searching the web for new designs.  I will continue to search out new designs and will post what I find every Monday instead of daily.


I found this pattern in a Family Circle Magazine many years ago and made copies of the pattern for future use.  A few years ago I needed a gift for a Secret Santa exchange and I decided to make  this cute little design for a quilting friend of mine. The picture above is the one I gave to my friend.  The pattern called for the doll to wear a straw hat but I decided to give her a funky hair style and tie it up with a bow.

I spent the last 2 days searching the internet for a similar pattern without success.  The pattern I have is from 1993 so I have not been able to find anything on the web that even comes close to the design I used.  The closest thing I could find was a Half Doll Pincushion made with a porcelain figure.


There are various places to purchase the half doll figures such as Ebay, Etsy or Amazon.  Some can be quite pricey but another option that I found on a YouTube video is a Barbie Doll Pincushion using a Barbie doll with the legs removed for the doll portion. I have included the link to the YouTube video, but as it is with many home made how to videos, this one is very slow moving and one needs to be very patient with the maker.

I hope that you join me next week to see what I find and over the next few weeks I will try to work up a pattern for today's featured design.

Wednesday, October 10, 2012

100 Days on Pins and Needles

Large Flower Pincushion Tutorial


Day 3

I am sure that most of us have seen the old tuna can pincushions, some of us may have made some of these for our mothers as gifts when we were children.  I took an old standard and again put my own spin on it to create a cute flower design.

Materials List

small empty tuna can or pet food can
3 sheets of acrylic craft felt: 2 sheets in the color of your choice for petals, 1 sheet to cover the can
9" diameter cotton fabric circle for pincushion
polyester fiberfill
hand sewing needle
thread
scissors
pinking shears or rotary cutter with pinking blade
sewing machine

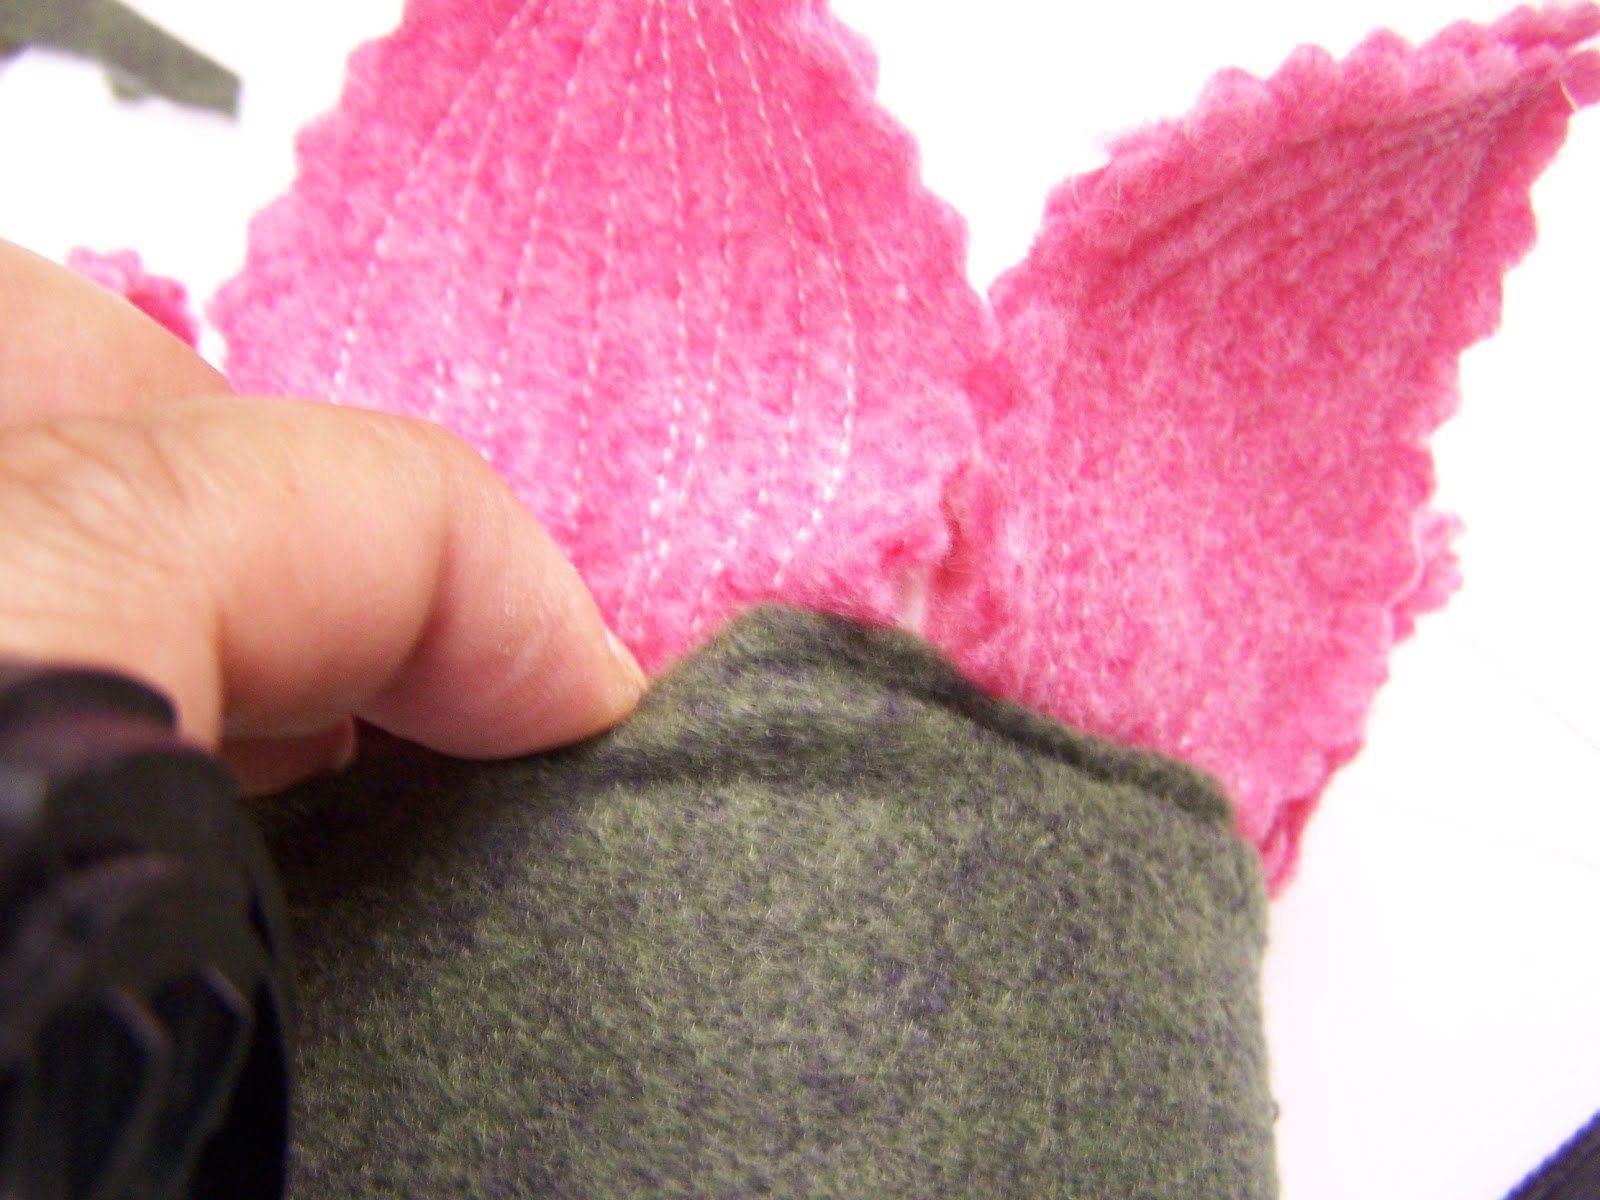
1.  I covered the bottom and sides of the can with acrylic felt using the same method as I used in my Felted Wool Bottle Cap Pincushion.  Remember to leave about 1/2 in excess fabric across the top of he rim.


2.  Layer your flower petal felt fabric and cut out 6 sets of flower petals or as many as you need or want to go around the can. You can draw a paper pattern or just cut them out free hand, which is what I have done. Pin petal sets together so that you don't mix them up. Using your pinking blade or shears trim around the edges to give them a nice finish.


3.  Using your sewing machine stitch down the center of the petal and then continue to stitch back and forth moving out until the petal is totally covered.  If you want you can do whatever kind of stitching you like as I have shown on the red petal. You can use a contrasting color of thread or a matching color, the choice is yours. This stitching helps the petals stability making them easier to work with.


OPTIONAL:  I made a small 4" diameter circle of muslin and filled it with crushed walnut shells to place on the inside of my pincushion.  The walnut shells are supposed to help keep your pins and needles sharp.  You can do this also if you feel confident enough to make your own.

4.  Once all your petals are stitched pin them around your can.  If you want to add more you can do so at this point.  Using a needle and thread tack each petal in place, this will make it easier to work with.


5.  Using a glue gun add a dot of glue to the inside of the can and press the petals down in place.  Don't worry about how the petals are positioned at this point, you will adjust that when you are finished.  Set the can aside for now.


6.  Take your 9" circle and sew a running stitch around the outside edge with your needle and thread pull tight to form a "cup" shape.

       
OPTIONAL:  If you have made a pouch filled with crushed walnut shells place it in the center of the "cup" at this point.

7.  Stuff the "cup" shape firmly with polyester fiberfill batting and pull your thread tightly to form a ball shape. Work your shape until it looks somewhat uniform in shape.


8.  Take your fabric "ball" and stuff firmly into the middle of the can until if sits firmly on the bottom.  If you like you could add hot glue to the inside of the can but your fabric ball should be firm enough and snug enough to not need it.


9.  Take the lip edge of the felt used on the side of the can and stuff it into the can pushing the petals down down also.  This will help keep the pincushion sitting tightly in the can.


10.  Once you have it stuffed securely into the can you can then form your petals into a flower shape.


Make your own if you like or click on the link above and purchase this beauty or one like it.  Whatever you choose I hope you enjoyed Day 3 of 100 Days on Pins and Needles.