Monday, May 6, 2013

Faux Cathedral Window Pincushion - Day 14 on Pins and Needles


Sorry for the break in blogging.  I had surgery almost 2 weeks ago and as much as I tried to get ahead it was just not possible.

Today I bring you a lovely little pincushion design that is fast and easy to make. The tutorial calls for 8 different fabrics but I made mine using only 2 fabrics for a more traditional cathedral window block look.


The tutorial calls for machine sewing the turned edges but I chose to hand stitch mine along with adding a shank button on top and a regular 4 hole button on the bottom.  This little pincushion is fast and fun to make and a great way to use up scraps of fabric from other projects.

Hope you enjoy this tutorial and I hope to keep bringing you some really fun projects every week.  If you drop by leave a comment and share any pincushion ideas you may have.

Wednesday, April 17, 2013

WIP Wednesday - My Twelve Step Quilting

The last time I left off on Step 5 of my "Twelve Step Quilting Program" and unforutnately last week was taken up with doctor's appointments so I had to skip my WIP update.

This week I have moved on to

Step 6:  Cut all the string squares into triangles and trim to size.


Step 7:  Remove all the paper foundations pieces.  The instructions for this pattern called for a small stitch length and I am happy to find that it comes in very handy when removing the paper foundations.  Its as if the paper were perforated and they peel off very easily.


Step 8:  Cut out my geese "wings" out of the gold toned fabric and start to finish off my flying geese sections.


Since this is a scrap quilt I don't know how far the number of geese I have will take me but I am anxious to see a finished product so I will stitch these together and make whatever size quilt I can.

I have 4 more steps to go to make this a true 12 step program and I hope that I will be able to make my way to the end of the road with this project. If you drop in please leave a comment and feel free to give out suggestions.  What has helped you work through a project to the end?  Are you a UFO (unfinished object) collector or do you work through one project at a time?

I hope that you have a smooth trip down "life in the craft lane" and are inspired to jump "on the wagon" with me and find a creative use for your scraps.

Monday, April 15, 2013

Picture Frame Pin Cushion - Day 13 of 100 Days on Pins and Needles


I have several empty picture frames lying around and this project seemed a fun way to use them to create something for my sewing space.  If you don't have any frames a quick trip to your local Dollar Store could fix that inexpensively, which is what I did to give this project a trial run.


The one in the tutorial was painted with acrylic paint but I used a small silver frame that I purchased at the Dollar Store to try out this project.  This is a project that you could do with a vintage frame and it can be set up as a display piece or lay it flat and use it when you do handwork.  It can be made using a large or small frame and embellish it with beads, buttons or other trinkets glued on the frame or sew them onto the pincushion edges.  It is an easy to do pincushion idea that required no sewing and the way I made mine I didn't even use any glue.


I used my silver toned frame that reflects the color of items around it and added some decorator fabric for the pincushion area.  I folded a small piece of polyester batting to just slightly larger than the opening of the frame.  I then layered the decorator fabric over it, centering the design I wanted to focus on.  I then pushed the batting through the opening to create the "pincushion" part, cut the fabric the size of the frame and tucked it into the frame edges and then slipped the back of the frame into place.  It may take a bit of effort to get the frame backing on because the fabric makes it a tighter fit, but it was great because I didn't have to glue or sew anything.


If you have a special frame you don't want to throw away find some fabric that works with it and make a pincushion.  Give it as a gift or display in your home, the possibilities are endless.

If you drop by to check things out please leave a comment and share any ideas you have.  May you frame your road down "life in the craft lane" with lots of memories.

Thursday, April 11, 2013

Thursday Tips and Tricks

Once more I have found a tutorial that will cut down on your sewing and piecing time when creating a quilt with flying geese blocks in it.  A simple to follow "one seam" flying geese, how much better can it get?


I have seen this done before but have yet to use it in anything I have created, it certainly looks easy to do which makes it an idea to keep handy.  

My second tip is not for sewing but a storage tip from "Sew Quilt Blog".  


This blog has some great project storage tips that are easy and inexpensive as well as how to keep your storage bins looking cohesive.

Hope you enjoy these tips and find some ways to incorporate these into your sewing or storage as you take your daily walk down "life in the craft lane".  If you drop in please leave a comment and let me know what you think about these ideas and how you can use some of these tips.

Thursday, April 4, 2013

Thursday Tips and Tricks

Today I decided to give out two tips.  The first one is actually a finish used on clothing but I thought it would also make a great border embellishment on a quilt.


The "shark teeth finish" is typically a clothing design but can you just imagine this look all around a quilt border?  I think this would look beautiful on an heirloom quilt in a shabby chic design.  I hope you give this technique a try, I think I certainly will use it sometime soon.

The second tip is how to create a variety of looks using a simple striped fabric block.  It's all in how you cut it out and reposition it.


Using striped fabric you can create some beautiful block designs with a lot less sewing.


Create this beautiful Seminole Patchwork design by simply offsetting the stripes.  You will find a variety of design combinations to use in this tutorial. 

Let your imagination run wild and see if you can incorporate the "sharks teeth" into your sewing or quilting or create a beautiful quilt with striped fabrics.  I hope that somewhere along your travels down " life in the craft lane" you are able to use these ideas.  Drop in and share your thoughts or if you have been looking for a tutorial on a particular technique just let me know and I will help you search the internet.  It could be something others have been looking for also.

Wednesday, April 3, 2013

WIP Wednesday - My Twelve Step Quilt Program

Hello everyone, my name is Ann and I am addicted to collecting fabric.  I don't just keep adding to my stash but I can't seem to throw any scraps away and it is totally getting out of hand so I started my own 12 step program.

Step one:  find a scrap quilt pattern that I could quickly and easily put together. So I started at one of my favorite blogs 
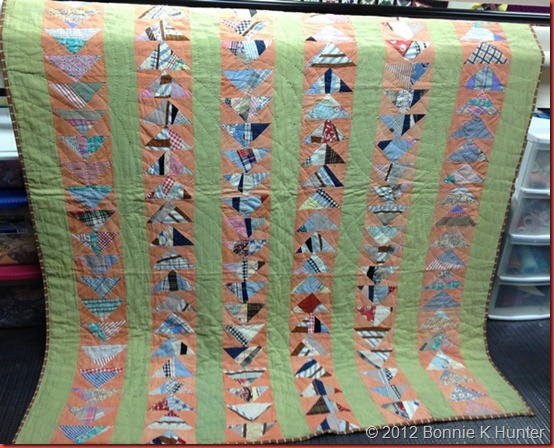
Bonnie Hunter at quiltville.com.  She has so many beautiful patterns to use up those pesky old bits and pieces of fabric and one called 
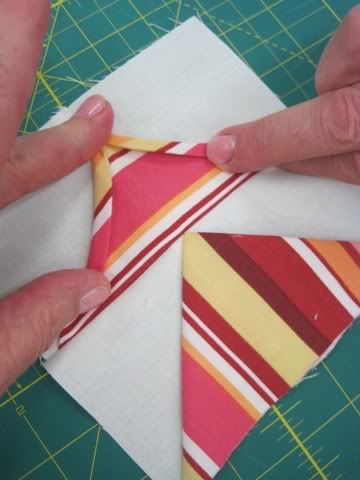
Geese on a String using paper foundations caught my eye.

Geese on a String by Bonnie Hunter

Step Two:  gather up all those scraps of fabric I planned to use.  I have a hard time randomly using fabrics of different colors, I find my self trying to keep the colors balanced and end up losing the whole concept of "scrap" quilting.  Because of this I decided to keep it in the brown, gold and orange color scheme, which I had plenty of.  I know it is Spring so tossing in the bright orange fabrics seems to really brighten up my color scheme.

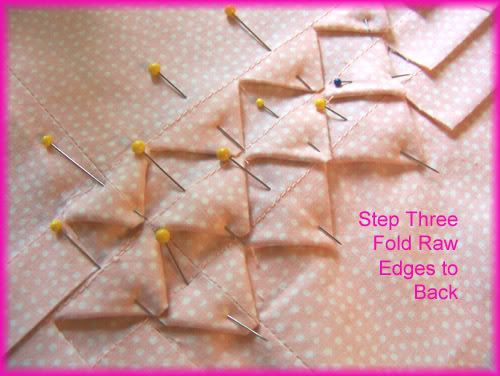
Step Three:  find paper I could use for the foundations.  I first started with tracing paper but quickly switched to using up old phone book pages cut to size.

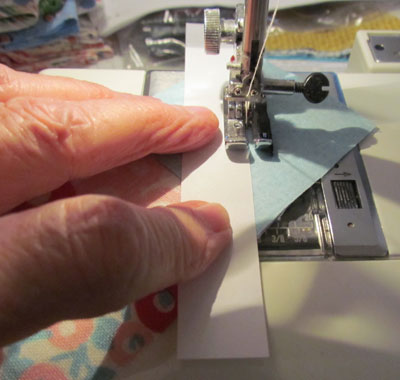
Step Four:  start sewing.  I have set aside 20 to 30 minutes a day to create at least 5 squares that will be cut in half on the diagonal to create the triangles needed for the flying geese.  This is what I have so far.


Step Five:  I chose a gold toned fabric for the triangle wings and when they are finished they will be combined with strips of the yellow and orange floral fabric 


I can only hope that I will not fall off my wagon and continue on to finish up the next 7 steps of my self imposed program.  I will let you know next week how it goes on the wagon down the road on "life in the craft lane". 

Monday, April 1, 2013

Pincushion Dish - Day 12 of 100 Days on Pins and Needles


Do you have one odd dish from a long lost set?  How about a vase you no longer use for flowers but can't bear to throw out?  Well after reviewing my collection of pincushion ideas I found this quick and easy project that transfers any small dish or vase into a lovely sewing room addition. 


For my first sample at the top of the page I used a small parfait dish and inserted my pincushion form and turned it into a handy pincushion on a pedestal.  My pincushion fit in the dish nice and tight so I didn't have to glue it to secure in place.

My second option, below, I made using my previously made "tomato" pincushion and a small Japanese tea cup that I found at the thrift store.  Once more the pincushion form fit in it nice and tight, so I don't have to worry about it falling out.


This tutorial is super easy to follow and takes only a few items to create a handy and cute addition to your sewing space.  Remember all you need is a dish or small vase, some fabric scraps, fiberfill, a pair of scissors, a needle and thread  then just click on the link above and find the instructions to start creating.

I hope you enjoy another fun idea for a quick and easy Mother's Day gift idea, add some special embellishments and create a very special one of a kind pincushion.  Don't have a dish or vase, check out your local thrift stores and see what you can find.

Enjoy this new idea to turn a household item and a few sewing or craft items into a great looking sewing accessory and don't forget to leave a comment or share what your are making.  

Drop in every Monday and join me in my search to find 100 different pincushion ideas as I take a walk down "life in the craft lane".

Thursday, March 28, 2013

Thursday's Tips and Tricks- Continuous Prairie Points

I have been browsing through several Pintrest boards looking for some tips and tricks to share and have come across several but today one will be enough.

As a quilter I love the look of a quilt with a prairie point finish but cutting out all those squares has always kept me from using this method.  Today I bring to you a continuous prariie point tutorial that is easy to follow because it is not only in print form but has a video tutorial that goes with it.


After watching this video I think this is a finish that would be easy to add to any quilted design and am ready to jump in and give it a try.  This finish could also be applied to the edge of a skirt or a child's summer dress, heck even a pair of capri pants would look cute with this edging.  

I hope that those dropping by will leave a comment and let me know what you think of my Thursday Tips and Tricks.  What are some of your tips and trips?  Feel free to share any that may help out a fellow quilter or crafter. 

I hope my ideas encourage you to try something new as you travel down the road on "life in the craft lane"

Monday, March 25, 2013

Flower Pot Pincushion - Day 11 of 100 Days on Pins and Needles

Spring?  Well whether mother nature is telling us it is Spring or if she is still covering you with a blanket of snow where you live, the calendar says Spring has arrived.  With that in mind I spent the weekend shopping for some new herb plants for my garden and at the same time purchased some crafting items at the garden center.  I brought my love of flowers and gardening into my sewing area by creating a fun and useful Flower Pot pincushion.


I used my handy E-6000 glue and attached a small clay flower pot to a clay flower pot saucer, adding the saucer gives you a great place to hold thread, buttons or other sewing notions you may need while sewing or crafting.  You could even add a larger saucer to give you more space for extra stuff.

I showcase two versions of my pincushions, in the first one I used a salad plate as a template and cut out a fabric circle, gathered the edge with a needle and thread then stuffed with fiberfill.  In the second version I inserted the tomato pincushion I made a few weeks ago into the pot to use as my pincushion.  Because of the tight fit in both I did not have to glue the pincushion into the pot, the pins are corsage pins and I added the flower beads to give them a really fun garden look. As always I found a tutorial to share if you would like to create your own flower pot pincushion to give as a gift or just add a touch of Spring to your sewing area.


The tutorial gives you an easy way to make the pincushion that requires no sewing and you use a hot glue gun to attach the pincushion into the pot.  A great tutorial that is fast and easy to put together.

I hope you create your own little garden to display in your sewing space, anywhere in your home or share a little bit of Spring with someone else.  If you drop in and check out my blog please leave a comment and let me know what you think.  I hope you enjoy a walk in the sunshine and don't forget to stop and smell the roses as you take an inspirational walk down "life in the craft lane".  

Friday, March 22, 2013

Friday Fabric Finds

With this weekly feature I hope to use up my stash and only those fabrics in my stash without having to purchase anything other than maybe backing fabrics.  So far it has inspired me to find creative combinations and patterns to use up what I already have.

This weeks selection includes some blue and white prints as well as blue and grey prints along with some blue blender fabrics.  With this collection of fabric I hope to create a bed quilt, but we will have to see how much total yardage I have.  This will be a challenge to find the right pattern design for this quilt but I really love the pop of blue and combining these different prints will be fun.


I wanted to show off what last weeks Spring prints turned into.  I made up 2 tablerunners and a set of mug mats from each of my fabric selections.  The mug mats make great computer mouse pads, I use one myself everyday.

 
Spring Tablerunner        or      Mug Mats/Computer Mouse Pads

Check back next week and see what happens to my Friday fabric finds as I take a walk down "life in the craft lane".


Monday, March 18, 2013

Easter Pincushion - Day 10 - 100 Days on Pins and Needles

Everything around us is Easter themed right now and with that in mind I continue to find more Easter pincushions that could have more than one use.  As I mentioned in my last pincushion post the stuffed egg shaped cushions could be given to children as a fun toss game for an Easter treat instead of candy. This weeks feature has a different twist as a home decor item but could also be used as a toss game item for children as an Easter treat too.


Pincushions are not just for pins.

 Many years ago when my husband was active duty Army we spent many years in Germany.  A tradition there during the Easter season they bring in fresh branches place them in a vase and create what they call an "Easter Tree".  They decorate them with blown out eggs that are beautifully hand painted along with little wooden decorations of rabbits, and other Easter themed items.

Along with the egg shaped pincushions I already made I added a new look with a felted wool egg that is decorated with machine embroidery and has raw edges cut with pinking shears.  I also found a new design, pictured above, to add to my "tree", making mine out of felted wool.  Instead of hand embroidery and felt cutouts I did some machine embroidery designs on the "egg", added felted wool blades of grass along with machine stitched grass, a die cut flower shape embellished with a button and topped it off with a sheer ribbon for hanging. If I were making it as a child's gift I would not add buttons or any other items that could be pulled off and swallowed.


I decided to use my newly made Easter Egg pincushions to decorate my own "Easter Tree" to add to my holiday decor.


Once Easter is over you can take your decorations down and hang them in your sewing room as a cute little decor item, use them as gifts for your sewing friends or keep them and use them as pincushions for yourself.

I hope that I have given you some ideas of not only how to make some cute gift ideas but how to add seasonal fun to your home and sewing.  Take a walk down "life in the craft lane" and see what you can find to inspire your next creative project.

Friday, March 15, 2013

Friday Fabric Fun

For a quilter one of the most important days is the one when you pick out fabrics for your next project. Decisions, decisions, what to do?  Should I pick what I like or should I step outside my comfort zone?  Do I go modern or traditional? Or maybe mix up the two and see what happens?

Sometimes fabric choices even come before you decide what your project will be, but in my case I want to make a tablerunner using Spring colors.  Inspiration is all around you and just the idea of Spring brings on a whole new list of color choices to mind.  There is the color of new grass


and if you are from Texas the deep blue almost purple of bluebonnets is always a great choice.


Or how about any of the beautiful colors of the wildflowers that will be showing their faces in the landscape very soon.


So what will it be?  The possibilities are endless but I narrowed it down to two fabric groupings and maybe I will make two runners just because I really like both choices.


What decisions will you be making for your next quilt project?  Fabric, pattern design or will you create your own?  Hope inspiration finds you or you find it when you take a walk down "life in the craft lane".

Thursday, March 14, 2013

Thursday Tips and Tricks


Today I want to share a great sewing tip that I found helpful and you might too. I will also show you how I adapted this method and found it very helpful in sewing my binding strips together.

Tired of marking your fabric squares to create HST (half square triangles)?  This tip from Quiltmaker Blog is the answer for you and the tip is "courtesy of Donna Amos, a member of the 2011 QM Scrap Squad". Use a piece of cardboard to line up your stitching line?  How clever!


I decided to use this method to piece my binding strips together and it worked beautifully.  Since I would be trimming the strips after sewing I left the selvage edges on and doing this also made the stitching line much easier to line up with the cardboard.  Instead of cutting a strip of cardboard I took the cardboard insert from a package of bias fold tape and used it to line up my sewing lines. Using my selvage edges as a guide to line up my cardboard I stitched close to the cardboard edge, making sure not to sew over it.  After sewing all my strips together I trimmed the excess off with my rotary cutter. If you have a longer seam or stitching line to sew just cut out a piece of cardboard to size.  I have a separate rotary cutter that I use for paper so I wouldn't have to use my fabric cutter.


I found this to be a quick and easy way to get my binding sewn together without having to mark fabrics and I can see that using it for HST or other corner to corner sewing will be a great help.

Hope you find this little tip helpful and time saving as you travel the road down "life in the craft lane"

Wednesday, March 13, 2013

Works in Progress Wednesday - Scrap Quilting

I have been working on this twin size scrap quilt for almost a year and finally got the top finished last weekend.  I have been slowly getting it quilted and today it is done and ready to take off the frame.


I created fabric by piecing random fabrics of all sizes into 12 inch finished squares.  The squares are set on point with lattice strips and cornerstones and I found this really fun multi-colored fabric to use as a border for such a colorful quilt.

Now to trim off the excess and get the binding on so it can be added to my Etsy shop inventory tomorrow.

Check out the other Quiltsy Team bloggers and see what they are doing today at our team blog, Wips and WhatNot.

Monday, March 4, 2013

Easter Egg Pincushion - Day 9 - 100 Days on Pins and Needles

With Easter fast approaching I decided to focus on some Easter Theme pincushions.  I found a cute little Easter Egg pincushion featured on Retro Mom Blog in March of 2009.  


The instructions are simple and easy to follow she also provides a link to the pattern you can print out for this project.  These little pincushions would make great gifts or display items, maybe even soft toys for a baby or toddler instead of giving plastic eggs full of candy.  After making a few I picked some up to show my daughter and the thought occurred to me that these would make great items to practice your juggling or to let your children toss in a basket as an indoor snow day or rainy day toss game.


As usual I made my own version of the egg in tone on tone off white fabrics and added a little twist to mine by placing it into a cup, you could also add some Easter grass or shredded green fabric in the base.  With the addition of an egg cup or dish it turns into a sewing accessory that is stable and won't roll away.  If you don't have an egg cup any small dish would do fine, I found some cute little plastic Easter eggs at the Dollar Store that work great as a stand for your pincushion.

I hope you enjoy this pattern as much as I did.  Create a dozen eggs and display them in a decorated re-purposed egg carton in your kitchen or sewing room for a fun country look.