Thursday, October 13, 2011

Santa is Coming toTown


Getting ready for the holiday craft shows with sets of fabric gift tags with traditional holiday characters.  Each tag is embellished with theme buttons and Santa has his fake fur trimmings to add some special dimension and fun.  I am having fun creating these cute little tags, they are so special and can be added to a gift  or used as a tree ornament.


This cute set of elves is embellished with glass beads and stitching on the hats and around the coat and pant legs.  Both sets of tags are finished with satin stitching around the edges in green thread and also an added second stitching with green metallic thread to give them both some sparkle.

Christmas is my favorite time of the year and I love to add special gift wrapping to every gift no matter how large or small, how expensive or inexpensive.  These tags will give each package they adorn a special sparkle and because they can be personalized the tags can be used as tree ornaments for years to come.


Wednesday, October 12, 2011

Quilted Holiday Decor


Flower pot cozies are a new addition to my shop inventory as I prepare for the upcoming holidays.  The combination of home decorator fabrics and quilter's cotton really dress up these fun little cozies and they make a great gift or decor idea.  Dress up your potted plant or silk flower arrangement or fill with homemade goodies to use as a lovely holiday decor item or give as a gift. They are part of my "affordable" Christmas items that I am including in my craft show inventory to make gift giving fun and easy on the pocket book.  The cozy pictured above recently sold and is on its way to Florida to dress up someone's holiday home decor but there are also more in different fabric combinations in my shop waiting to find a home.


Made in different fabric combinations these little cozies can be made for any holiday or celebration and because they are soft sided they are easily stored to use next year.  Red wool and cotton lace dress up this fun holly print to make a great holiday hostess gift combination of some sweets and flowers.

This was a fun project to do and my family will be celebrating birthdays soon so I plan to add some birthday cozies to give as gifts.  I plan on filling them with candy bouquets to give as gifts so now I am busy looking up project ideas on how to make candy bouquets which will be another money saving idea.

I love giving gifts but going broke is not fun for me or my customers, so looking for affordable projects that I can make as gifts or add to my shop has become a mission for me.

Thursday, September 22, 2011

I Love Texas!


"As a child my families menu consisted of two choices:  take it, or leave it."
Buddy Hackett


A favorite at last years craft shows were my recycled/upcycled denim jean aprons. With denim in so many different colors I have a variety of jeans to work with and I can coordinate the cotton fabrics I use with them, but this week I was able to put together a couple of aprons with standard blue denim jeans that show my love of the great state of Texas.  I consider myself a true Texan having been born and raised here, even though I spent most of my adult life living in other parts of the world because of my husbands duty stations in the military.

As a tribute to all my fellow Texas cooks out there I have created these two aprons.


I have a variety of designs and I use different colored denim jeans to create with, but these two are a couple of my favorites.  They make great gifts especially for a Texan that is living far away from home to help them show off their true Texas pride.  I have also created a couple of custom order aprons using Texas themed fabrics for a customer that wanted to send her daughter that lived out of state a special gift from home.  Whatever your special interest is, if there is a fabric, I can create an apron from it. 

I hope that this inspires some but if you find you don't have the time or inclination to work on this sort of project just click on the link and head to my shop and browse what is available.  If you don't see what you want then just contact me for a custom order.

I need to get back to making my Christmas gift list, I have my own someone special in mind for a Texas apron.      

Tuesday, September 20, 2011

Holidays on a Budget


"Blessed are those who can give without remembering, and take without forgetting"
Princess Elizabeth Bibesco

I recently started gearing up for the holiday season craft shows and found that I had 6 invites to answer which means my inventory has to be ready to go by October 1st.  I find that once the craft show season gets going there is little time to replenish the inventory so most of it has to be done ahead of time.


This season I am focusing on smaller items such as my postcards and gift tags.  These gift tags were a big seller last year at a couple of the shows with customers that didn't want to spend large amounts of cash but wanted something special to add to a larger gift or to give as a small token.  They make great gift tags and can also be used as a tree ornament that you can personalize and date on the back for years of memories.  Slip one into a Christmas card and add an extra special surprise to your holiday greetings.  Easy to write on with an ultra fine tipped sharpie marker or a fabric marker and since these will not be washed you don't have to worry about your personal message fading.

Hope everyone is gearing up for a great holiday season and even though times are hard sometimes the smallest gestures are the most appreciated.  So with that thought I am off to create some more small inexpensive items that go a long way to show how much someone is loved and appreciated.


Monday, September 19, 2011

Language Barriers and the Double Wedding Ring Quilt

"To have another language is to possess a second soul."
Charlemagne

Last month I tried doing a new project every day but got totally sidetracked when a custom order for a Double Wedding Ring Quilt came in from Australia.  When the first inquiry was made there was a bit of a language barrier issue as my customer requested a "throw rug" be made as a custom order.

As I read her request I was totally taken aback at the thought of someone using one of my quilts as a rug to walk on, because to me a throw rug is something that you place on the floor.  I could not imagine having someone put their dirty shoes on a quilt that I had worked on so painstakingly, it broke my heart just to think about it much less imagine what that would look like.  I explained, in the most diplomatic way I could, that I did not believe the fabrics would hold up over time if someone were walking on them and that it would be slippery creating a safety hazard so I would not be able, in all good conscious, to work on this requested project.  I was bummed because I really enjoy working with customers to create their vision and a custom order would mean a nice sale after a very slow year and it would have been nice to get back on the right track.

My customer contacted me and explained that there was an obvious misunderstanding of terminology, because in Australia a lap quilt and a throw rug were the same thing.  We both had a good chuckle and the order process began, this really raised my spirits to have a new custom order to work on.  She wanted an extra large lap quilt and asked for a particular color scheme to coordinate with her furniture upholstery.  After doing a bit of shopping at a local quilt shop I found the perfect combination of colors and work began.  I used an Eleanor Burns pattern from her book "Egg Money Quilts"  for this double wedding ring design and got it finished and ready for mailing.

I am happy to say that it has been mailed to the owner and I am anxiously waiting to hear if it has arrived safely and that my customer is happy with her purchase.


Language can bring us together or keep us apart, sometimes the differences can be amusing and have totally different meanings even when we believe we are speaking the same language.  Being Hispanic I have known this all my life but it never occurred to me to request clarification from my customer, who I believed was also speaking English, and this has taught me a good lesson for future inquiries.

Has this ever happened to you?  How did you react and how did you clarify your needs or those of a customer?    If you stop by please leave a comment, I would love to know about your language barriers and hear what others have been through and what lessons there are to learn.

Friday, August 12, 2011

Creativity Day 16 - Photos on Fabric

Okay, sometimes the internet is your friend and sometimes it is not.  After a few days of internet browser issues, that I hope have been resolved, I am back.

Among my hobbies is photography, I love taking pictures of everything, especially flowers.  Every year I like to photograph my garden with before and after pictures, but this year the drought in Texas has kept me from doing much gardening.  A few weeks ago we traveled to visit family in Indiana which up to that point had the perfect amount of rain to grow some of the most beautiful flowers I have seen all summer.  I spent a day taking pictures of some of the lovely scenery and I have decided to add a new technique to my postcard making.  Color photos on fabric is a new thing for me.  I have done several photo quilts but the photographs have always been in black and white so doing color photos will be a new experience.


I think this is going to make a beautiful greeting card for a birthday, housewarming or just to say hello, the message on the back is up to the sender.  I was surprised at how vivid the colors were on the fabric and I think I will finish up the postcard and maybe even do a bit of bead embellishment on a couple of the other pictures I have.  One more beautiful and easy to personalize idea to add to my shop.


Tuesday, August 9, 2011

Creativity Day 15 - Read All About It

"Always read stuff that will make you look good if you die in the middle of it."
P.J. O'Rourke
I had to skip yesterday's creativity project because my iron died.  Arrangements have been made and in lieu of flowers just send words of encouragement to the new addition to my sewing room.  I promise not to abuse her too much, I am getting a new ironing board to make sure that she feels more secure and doesn't topple over the edge as often as my last one did.


I love creating quick and easy little items in between my custom orders and larger quilting projects, so for today's post I am featuring a bookmark that I made to accompany my new book, "The Help" by Kathryn Stockett.


 This bookmark is made very much like the postcards, using the Pellon Peltex stabilizer and fusing fabric on both sides.  I combined 2 machine embroidery designs in a bright green color to embellish the front of the bookmark.   I then placed a ribbon between the top and the backing fabric and then satin stitched all around. This method catches the ribbon securely and gives all the edges a clean finish.

This was a fun little project made using fabric scraps and bits of ribbon that were not large enough to use for anything else.  There are some more ideas bouncing around in my head because there is an over abundance of scraps lying around my sewing room, so we will see what I come up with next.

Sunday, August 7, 2011

Creativity Day 14 - Wrap it Up!

"Blessed are those who can give without remembering and take without forgetting."
Princess Elizabeth Bibesco


Continuing on the holiday theme I decided to create a few smaller items.  These are fabric gift tags that measure about 3 inches square with a ribbon for hanging on a gift and/or on the tree.  Just like my fabric postcards these can be personalized on the back using an ultra fine tip sharpie marker or permanent ink fabric pen.


I love to add something special to my holiday gift wrapping and these can be personalized so that the receiver can use them year after year as a holiday decoration of their own.

Saturday, August 6, 2011

Creativity Day 13 - Push those Buttons

"It is far more difficult to be simple than to be complicated."
John Ruskin


Sometimes using the simple things to create with can be more difficult than using a more complex item or design. For my day 13 project I took some simple green buttons and created a new Christmas postcard design.  I went through my big vintage milk bottle where I store some of my button collection and found enough green buttons to create the design I had in mind.  I like to hand stitch each button individually to make sure that they are secure on the card.  

Using postcards for my creativity project has made it possible to create individual items everyday and using items that I have on hand has also helped me dig deeper into the stash of ideas I keep in my head.  Learning to find new uses for items is what fuels the creativity and makes every finished item unique and special.

Friday, August 5, 2011

Creativity Day 12 - Presentation

"It is not enough to stay busy.  So, too, are the ants.  The question is what you are busy about."
Henry David Thoreau

As a business woman I participate in numerous Holiday craft shows so how I present my products is always part of the sale experience.  I also like to put my best foot forward when I mail a customer their purchase they have made through my Etsy shop, I think it adds a positive note to the mail order experience.  Sometimes even though we feel that we have explained how something is used or think that it should be obvious to a customer that is not always the case.  The addition to a package of suggestions or instructions is always a helpful and thoughtful thing to do.  So, last night, as part of my creativity project,  I decided to design an insert for my fabric postcards.  I worked on a design that would have product and business info on one end of the sheet that would fold over to the front of the cellophane packaging and instructions and/or suggestions for use of item on the back of the package.

I made a text box at the top with the name of the item and business info that I rotated so that when it was printed out this section looks upside down.  I then added the instructions/suggestions info to read right side up and added a couple of photos to help with visual instructions.


Once edges are trimmed with a ruler and rotary cutter(used for paper only) I fold the top section and staple it in place on the postcard packaging and add a piece of double stick tape to hold the back flap secure.  Using these clear wrappers keeps the postcards clean and makes the end product look much more professional and since I do craft shows it makes it possible for customers to handle the items and still keeps my merchandise clean.


Taking a few extra steps might just close that next sale and customers appreciate a professional presentation especially when they are buying handcrafted items.

Presentation is everything!  Lets put our best foot forward in everything we do.  How do you make your products shine?  Share or comment please.

Thursday, August 4, 2011

Creativity Day 11 - Day of the Dead Memorial Wall Hanging


"Life is a great surprise.  I do not see why death should not be an even greater one."
Vladimir Nabokov

I took a mini class at the Houston International Quilt Show a few years ago on how to make a Day of The Dead wall hanging and being of Hispanic background, I have always wanted to make one for my Mother who passed away 16 years ago.  The class was part of the "Make It University" with "Cloth Paper Scissors Magazine" Workshops which is an inexpensive way to take a class that includes all supplies and instruction by the artist.  You don't have to invest lots of time, most projects take 1-2 hours and the cost is only $15 which is great because there is time for questions and even one on one help if you find that the class is a new technique to you. Admittance into the class is done by drawing names out of a fish bowl and you have to be present to get in and payment is cash only so it is exciting and fun from start to finish.  I recommend taking a chance on getting into one of these classes if you attend Quilt Festival, it is a great way to learn new techniques.

Yesterday was Day 11 and this is what I made:


It is not quite finished because I want to add a few more embellishments and a ribbon for hanging on the wall.  I  did use some of Mom's favorite colors and she loved flowers so I made a one using antique Mother of Pearl buttons, one felt free form cut flower and added some pink roses trim.


This morning I copied a picture of her that was perfect for this little memorial hanging and she just happened to be wearing colors that went along with the color scheme I chose.


There is a picture frame pocket to add a photograph and there is also a pocket behind the photo to add any special mementos that you don't want out for all to see.  This has been a special project and one that I will hanging in my sewing room so she can keep me company everyday while I work.

I have special memories about the person that inspired me to be who I am, I hope you will share some memories or at least that my project will bring back memories of someone special you love and is no longer with us.

Tuesday, August 2, 2011

Creativity Day 10 - Holiday Greetings

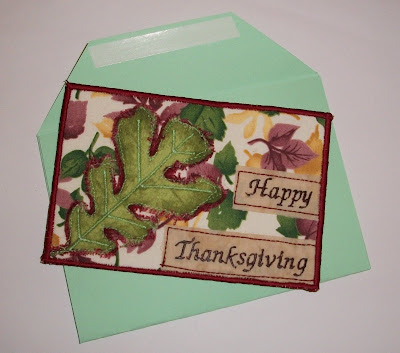
In keeping with the holiday spirit I spent today creating another postcard.  This one would be great to send to family, friends or anyone that you think is special.


The holiday season will be here before we know it so it is best to start planning now how we want to share with family and friends.  This item would also make a great hostess gift if you are planning to visit someone for Thanksgiving dinner.  Just write you thank you message on the back and it will be a special gift for your host to remember you by.  We usually have family at our home for dinner and I think I would love it if someone thought enough of me to bring me a special gift such as this.  

What do you do for the holidays?  Share your thoughts and comments.

Monday, August 1, 2011

Creativity Day 9 - Fall Table Runner

After having made some holiday postcards I decided it was time to start gearing up with inventory for my holiday craft shows.  I also hope that creating Fall items will help me at least feel like it is getting cooler even when it is 100 degrees outside.

Fall brings about changing leaves from green to gold with varying shades of orange in between so I created this Fall runner to showcase those colors.


I always like to make my runners reversible, sometimes you just want to change things up during the holidays, so why not get a two for one deal with pumpkins and squash on the back to celebrate the season.


Holidays mean family and friends getting together sharing meals and having a good time, so why not dress up your surroundings with handmade items that reflect the season to add to the mood.  I love the holidays and decorating is always a family affair so this item is perfect for celebrating Fall.

Sunday, July 31, 2011

Creativity Day 8 - Beaded Postcard and Padded Envelopes

Since it is the weekend I didn't want to take up my whole day working on something that was very hard or involved lots of time.  Last week I made some handcrafted envelopes for some fabric postcards but today I wanted to create padded envelopes that would protect a fabric post card with embellishments.

I did a quick Google search and found several websites offering tutorials for padded envelopes , the directions were easy to understand with some great visual instructions to follow.  I had everything I needed on hand, bubble wrap, double stick tape and cardstock.


After following the instructions I had my padded envelopes to pair with some Christmas Gift Tag/ Cards in my Etsy shop and a new listing for this beaded fabric Christmas card.  The envelopes are sturdy and ready to be addressed and sent off in the mail.


This was a fun envelope project and very simple to do with just a little bit of research involved and now I have some great new items to pair with some of my inventory.

What special things do you do when it comes to gift wrapping especially at Christmas time?  Please comment and share any thoughts or ideas.

Saturday, July 30, 2011

Creativity Day 7 - Adding the Finishing Touches

Actually yesterday was supposed to be day 7 but sometimes the ideas just take a bit longer to actually turn into realities.

When I was sewing my paper pieced sections together it came to me that this would make a cute tote so as soon as I was done with the circle I took it apart and started working on my idea.


The little tote has a a lining with a double pocket on the inside, one open pocket and one with a zipper to secure valuables.  The tote itself has a magnetic closure so that everything says out of sight inside the purse.


This project has taken five days to complete but now I have some new found knowledge and inspiration for future projects.  I have learned that using my computer to design can be fun and inspiring and making a Mariner's Compass quilt block is no longer as intimidating as it used to be.

Tomorrow starts my second week of my Creativity Project and I hope my readers continue to drop in and comment or share ideas with me.

Thursday, July 28, 2011

Creativity Day 6 - A New Listing

This morning I got going early and finished off the paper pieced compass and I was really thrilled how it came together. Unfortunately time is limited today and I was not able to do the project I wanted with the large quilt block.


I didn't want today to go without anything else getting done so I decided that a mini block was in order and would be easier to put into a finished piece.  I actually only used a 1/4th of a mini block for this cute little postcard.


This Mariner's Compass project has been so much fun and tomorrow I will continue to work on the larger block so that I can get it finished and share it with everyone.

Fabric postcards are fun to do and easy to put together once you get the hang of them and I love how this little bit of sunshine came out.  What is your favorite type of project?  What do you find that is easy to do?

Please share with us and comment on what kind of projects are your favorites or are a breeze for you to get done.

Wednesday, July 27, 2011

Creative Day 5 - Creating Your Own Patterns

"I never did a day's work in my life.  It was all fun."
Thomas Edison

After working all day yesterday on a design the only way to judge whether I had been successful or not was to actually make my quilt block.  I began the day by printing out a copy of my pattern cutting out the section that I would be using for paper piecing and then enlarging it to the size I wanted.  I actually ended up with a slightly larger block but this should be fine for a test run.


Making a test block is the only way to check out a pattern, and this one seems to be working out just fine.  This is only half done and when I finish the other half I will be able to see how the block will work out for use in a quilt.  Working on this block has been a great learning experience and lots of fun, now I am not afraid to try and create some different patterns for another Mariner's Compass block.

Taking the time to learn to use tools more efficiently or learning to use new tools is really worth the time and trouble.  I know that I am not going to stop here, there is so much more that I can do with my computer program I just need to take the time to learn how to create using a new tool.

If you drop in leave a comment and tell me what you think about this design.  Tomorrow I will be doing something creative using my finished block so drop in tomorrow evening and check out what I have planned.

Tuesday, July 26, 2011

Creative Day 4 - New Tools

"Progress is not created by contented people."
Frank Tyger
Creative Day 4 

Sometimes creativity is not just about making something but it is about learning something new.  As a quilter I have many tools that are used to create designs, rulers of all sizes, templates for cutting out shapes, books with patterns, sewing machines, quilting machines, and a computer.  I use most of these tools daily but the one I have not used very much is my computer, that is until today.  I decided to utilize my computer to create a paper pieced pattern that I have wanted to try for a long time but never had the courage to do before.

A Mariner's Compass Quilt Block has always seemed too difficult to do but I have always wanted to give one a try and I decided that learning to draft one was probably a good starting point.  I have Electric Quilt programs 6 and 7 and have used them occasionally to draft custom blocks for my memory quilts but never to create a mariner's compass. After a bit of research I found a great tutorial on-line to get me started, http://freelessons.jantsutopia.com.au/ ,and after reviewing it I gave it a try.  It took me several attempts before I finally got a design that I was pleased with and that I could convert to the type of pattern I wanted.

After working on the computer most of the day I finally have a pattern for a 12 inch block that I can convert to paper piecing and start working on.  It is not an extremely complicated pattern but for my first try I think it is a good place to start.

Tools are very useful but sometimes the tools themselves can seem scary to use. We keep them around because the intentions are always there to learn more about them but we put off using them because of the time it will take to become comfortable with them.  Tools are by definition:  a device for doing work, a means to achieve something, something used in the course of somebody's everyday work, so today I learned how to use one of my many tools and really had fun doing it.

If you drop in please leave a comment and let us know what tools do you have that you have yet to make the most of or which tools are your favorite.


Monday, July 25, 2011

Creative Day 3 - A New Technique

They that go down to the sea in ships, that do business in great waters, these see the works of the Lord and his wonders in the deep.
PSALMS 107:23-24

The last two days have inspired a postcard and an apron and potholder set which are really not new techniques to me.  Today I would like to try something new and see how it works out.

Paper piecing is a quilting technique that requires you to sew pieces of fabric onto a foundation of paper in a particular order and end up with a design. Here is what I designed today.


The paper pieced block was a 2 1/2 inch square for the sail boat, adding some extra sky on the top and sea on the bottom I was able to make it large enough to create another postcard.  The postcard can be framed as art or mailed in the handcrafted envelope I created to go along with it.


This project of paper piecing was quick and fun and turned out a mini block that I would never have been able to do using any other method of piecing.

If you drop in please leave a comment, I always love to hear from everyone.


Sunday, July 24, 2011

Creative Day 2 - Breakfast Inspiration

After starting my creative journey yesterday I really had no idea what to create on day two. I went to bed uncertain of where the road to creativity would take me and decided that I would wait for the coming daylight to bring me some inspiration.

I woke up at 7:30 am, which is really late for me, with thoughts of making fresh coffee, waffles and bacon for breakfast.  The coffee, of course, came first and then I started frying bacon and anyone that has ever fried bacon will know, grease begins to spatter everywhere and this is where my inspiration came from today, an apron with a matching set of potholders was what I needed to create.

The fabric I chose is actually a cotton decorator fabric that is a bit heavier than regular cotton fabric, but for an apron it is the perfect weight.

First came the apron, a full size one with adjustable neck strap and ties that wrap around to the front making it easy to tie up.


The two potholders incorporate my quilting skills in this project.  One potholder is made with the matching apron fabric and quilted in an outline stitch on part of the fabric design, the other is a traditional quilt square in colors that compliment the apron and both have hanging loops.


Please feel free to leave a comment, idea or suggestion.  After warming up with two easy project I plan on doing something a bit more involved tomorrow, so please make sure you check back in to see what I am up to.

Saturday, July 23, 2011

Daily Creativity

"Creativity is the defeat of habit by originality."
Arthur Koestler

This year has been a real downer for me and in an effort to revive my creative side I have started a daily creative journal.  One creative project per day for as long as I can keep it up, which I hope is a long time.

Creative Day 1

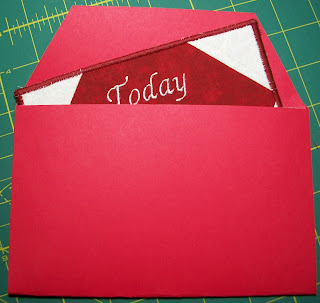
Keeping it simple and using only what I have on hand I made a simple fabric postcard, "Today is the Beginning", a reminder of things to come.


When I finished with the postcard I decided a handmade envelope would be a good way to complete today's creativity project.


The postcard can be hand cancelled at the post office but I rather put mine into an envelope to make sure that it doesn't get dirty and if any embellishments are added they won't get pulled off or damaged.


This is the first of what I hope to be many projects and I hope to focus on my quilting more than anything.  There are many techniques that I am anxious to try out and doing them in smaller projects will help me decided which ones I want to explore more deeply.
Please feel free to leave a comment, or give a suggestion as to any projects or techniques that might be fun and interesting to try out in a small project.

Wednesday, June 1, 2011

Calculations and Free Apps

"The things of this world cannot be made known without a knowledge of mathematics"
Roger Bacon

I was never fond of math class and it wasn't because I didn't understand it, I just wasn't a numbers person, at least I didn't think I was.  You know it was one of those classes that you think you will never need, so why try.  Little did I know then that I would be using it on a daily basis in my business and not only for keeping track of the bookkeeping.  Most of the time I do the math myself but sometimes I like to take shortcuts so finding new helpful sites or apps can come in very handy.

When it comes to quilting there are always calculations to be made, from size of finished and unfinished blocks to the total size of the quilt itself.  I make custom t-shirt quilts using shirts that people have been saving for years so they are in varying sizes making it necessary to figure out placement and measurements to make the quilt look balanced.  I also add sashing strips and framing borders so this all needs to go into the calculations of the finished size of the quilt.  Blocks are not always the same size so making it looked balanced can be tricky.


The purple quilt was actually lots of fun to put together, it really challenged me because of the sizes of shirts and the designs.  I loved working on this quilt even though it had me pulling my hair out at times while trying to make all my calculations and get the setting just right.

There are lots of calculations that go into creating a custom t-shirt quilt and those I do myself, but sometimes we quilters like to use shortcuts especially when calculating batting, backing fabric, or binding fabrics.  When I need help with this I go to one of my favorite sites called "Quilters Paradise" to make everything go so much faster  http://www.quiltersparadiseesc.com/Calculators.php    Well a couple of days ago one of my facebook friends asked about calculating corner triangles and I sent her the link to this great site to help her out.  When I went to check the link I found that they had added this wonderful new iphone / ipad app that makes it so easy to just carry this calculator with you when you go shopping. It took seconds to download on my phone and I did it while I was shopping and had the calculator ready to figure out yardage right on the spot.

This app is handy not just if you quilt, if you use fabric for any craft you might find it handy to calculate how many pieces of a specific size you can get out of a certain size of fabric.  You might even be able to use it for paper crafting since you plug in the size of fabric/paper you are using and what finished size of item you need.  I hope that some of you may find this web site or app helpful, I know I find it a very handy tool.

If you have any other free apps or website links to helpful tools add a comment and share your ideas.  I love finding new sites that make life easier, especially when it comes to work.  

Saturday, May 28, 2011

Sew Along

"It is not the answer that enlightens, but the question."
Eugene Ionesco

A couple of months ago I posted the start of my "Sew Along" project and since then I have added a few more blocks to the collection.  We originally set out to do one block per month but it has actually turned out  that we are actually working a bit faster than expected and now have 7 blocks down.  I am one block behind the list having taken a break during the month of March to spend with family.  Seems that this quilt will be done sooner than I had originally planned which is fine with me.

I am happy to add that I have been keeping to my "fabric diet" with only fabric purchases for custom orders and one special project for me.  My "sew along" blocks are still being worked with stash fabrics that I had set aside at the beginning of this project and I am very happy with the way the blocks are turning out.


Basket Block


Birds In The Air Block


Shoo Fly Block


North Star Block

Sometimes life gets in the way of things we find pleasure in doing, but it is rediscovering pleasure in the small things we enjoy that seem to get us going again.  I love hearing what gets others going, it is knowing how others cope that can help us find answers to our own questions during difficult times.  How do you get yourself going when you are in the dumps or find yourself in a slump?  I love hearing from others and wonder how you cope with the bumps in the road. Please leave a comment if you stop by.

Bumps in the Road

"Life is a great surprise. I do not see why death should not be an even greater one."
Vladimir Nabokov

My intentions of blogging at least once a month met up with the proverbial bump in the road a couple of months ago.  We all have those "bumps in the road" that cause us to stop and go around, turn around or just stop in our tracks. In March I came upon a bump in the road that caused me to stop in my tracks when my oldest brother passed away.

It has taken me a couple of months to get back on track but here I am, not quite over the bump in the road but certainly back on the road again.   I am taking it a bit slow, getting back to work on unfinished projects and new custom orders as I spend time with family.

Monday, February 7, 2011

Fabric Diet


"The one way to get thin is to re-establish a purpose in life."
Cyril Connolly

When the new year started I decided that I had to go on a fabric diet because I have just about run out of room to put my "collection" of fabrics, threads and tools.  So far it has not been that difficult to keep from buying fabric because it has been so cold I haven't even wanted to venture outdoors much less go shopping.  I am into my second month and so far have done well, I have purchased fabrics for custom orders that I could not do without purchasing new fabrics, along with some stabilizers and threads for an embroidery class I took.

In order to use up my fabric stash and thin down I signed up to do an online sew along with a group of quilters from one of my online forums.  We are working on one block per month which is perfect for me since I have my Etsy shop and custom orders to work on.  Keeping my diet, I  decided to chose fabrics from what I had on hand which meant that the background fabrics would not all be the same but would all be tone on tone off whites.  We are using patterns and instructions from Eleanor Burns' Quilt In A Day book "Underground Railroad Sampler" and so far we have made two blocks.  I am happy with the outcome, but need to remember to read through all instructions before starting out so that I make sure my blocks come out the right size. 
Wagon Wheel Block


Bear Paw Block

Even as an experienced quilter I sometimes get ahead of myself and assume that it will all work out in the end, only to find that my blocks are not turning out the right size.  I may have missed a measurement or squaring up sections of the block before sewing things together and then it is time to back track and start over.  I have to either re-cut pieces or unstitch seams also known as frogging( rip it, rip it) to make sure that the unfinished block is the correct measurement.  When putting together a block that has several pieces it is important to be precise, if you are off in your cutting or stitching it can add up to a big mistake in the end when squaring up the whole block, stitching the quilt top together or doing the finishing quilting.

Working on this project is helping me lose some fabric weight and keeps me in touch with old and new friends as we work on this together.  I hope that in the end this will turn out to be a queen size quilt for my own bed and with only one block per month it will, hopefully, be done for next winter.

Quilting has brought me together with so many wonderful people and helped me make some great friendships along the way.  It is one of those "obsessions" that, for me, has had a positive effect and encouraged me to move outside of my comfort zone, to try new things from sewing, traveling and volunteering to do things I would never have thought of before.

How has your craft encouraged you to move outside your comfort zone?  Share and comment on what positive effects your craft, whether it be quilting, scrapbooking, knitting, etc, has had on your life.  I always love to hear what others feel about what they are doing now or have done in the past.